We bought our house in July 2016. It's a two bedroom Victorian house with a decent sized garden for a house in London.
I began working on the garden in March this year and have developed a passion for working in the garden!
So what needed doing? everything!
From the back doors we had standard old decking which had partially rotted through. Then a step-up patio which looks like it was laid in the 90s - square concrete mock-stone slabs in a god-awful pink. The lawn we won't mention - that's a whole task in and of itself!
 |
At the rear of the garden someone had helpfully poured a very good concrete footing for a garage - roughly 15' wide by 18' deep. This was the only redeeming feature of the garden after it's size!
This is where the garden saga started. My grand plan was to have a very large patio from the back door that incorporated and replaced the first patio - this would become a lawn and then a matching patio at the rear.
I measured and ordered around £1,000 in Indian sandstone which I had calibrated to 20mm. Enlisting the priceless help of my old man and my brother, we set about laying the rear patio. As amateurs I think we've done a pretty good job of it, though it took a lot longer than I was expecting.

Halfway through I dug out and built a planter with new railway sleepers sourced from Forestrall in Kent - really good quality and great value! This was filled with mixed hardcore for drainage (broken bricks and a few bags of plum slate I removed from the front garden). I ordered a ton of topsoil from The London Topsoil Company of which 75% filled this planter.

We got a great deal on plants through a local garden centre and picked out species that will do well in our oven of a garden - it's South West facing so gets sun all day long!

It was at this stage my fiancé decided she no longer wanted the patio to go right to the back door, feeling it was too much stone and would feel "cold" and a little 2 dimensional, given how much of the same stone is being used elsewhere in the garden.
I was very lucky in that the family behind my brother's house in North Essex had some new decking laid and a quick chat with the team doing this led to a very good deal on hardwood Balau decking to replace the old stuff outside the back door. It's about half the width of standard decking and is textured on one side and completely flat the other - this is the side I prefer, as I am naturally drawn to more minimalist design!

In pulling the old decking up, the rot was more extensive that I at first imagined - the 4 beams used as supports had been covered with a thick rubber membrane, trapping moisture in the wood and causing it to turn into a sponge!
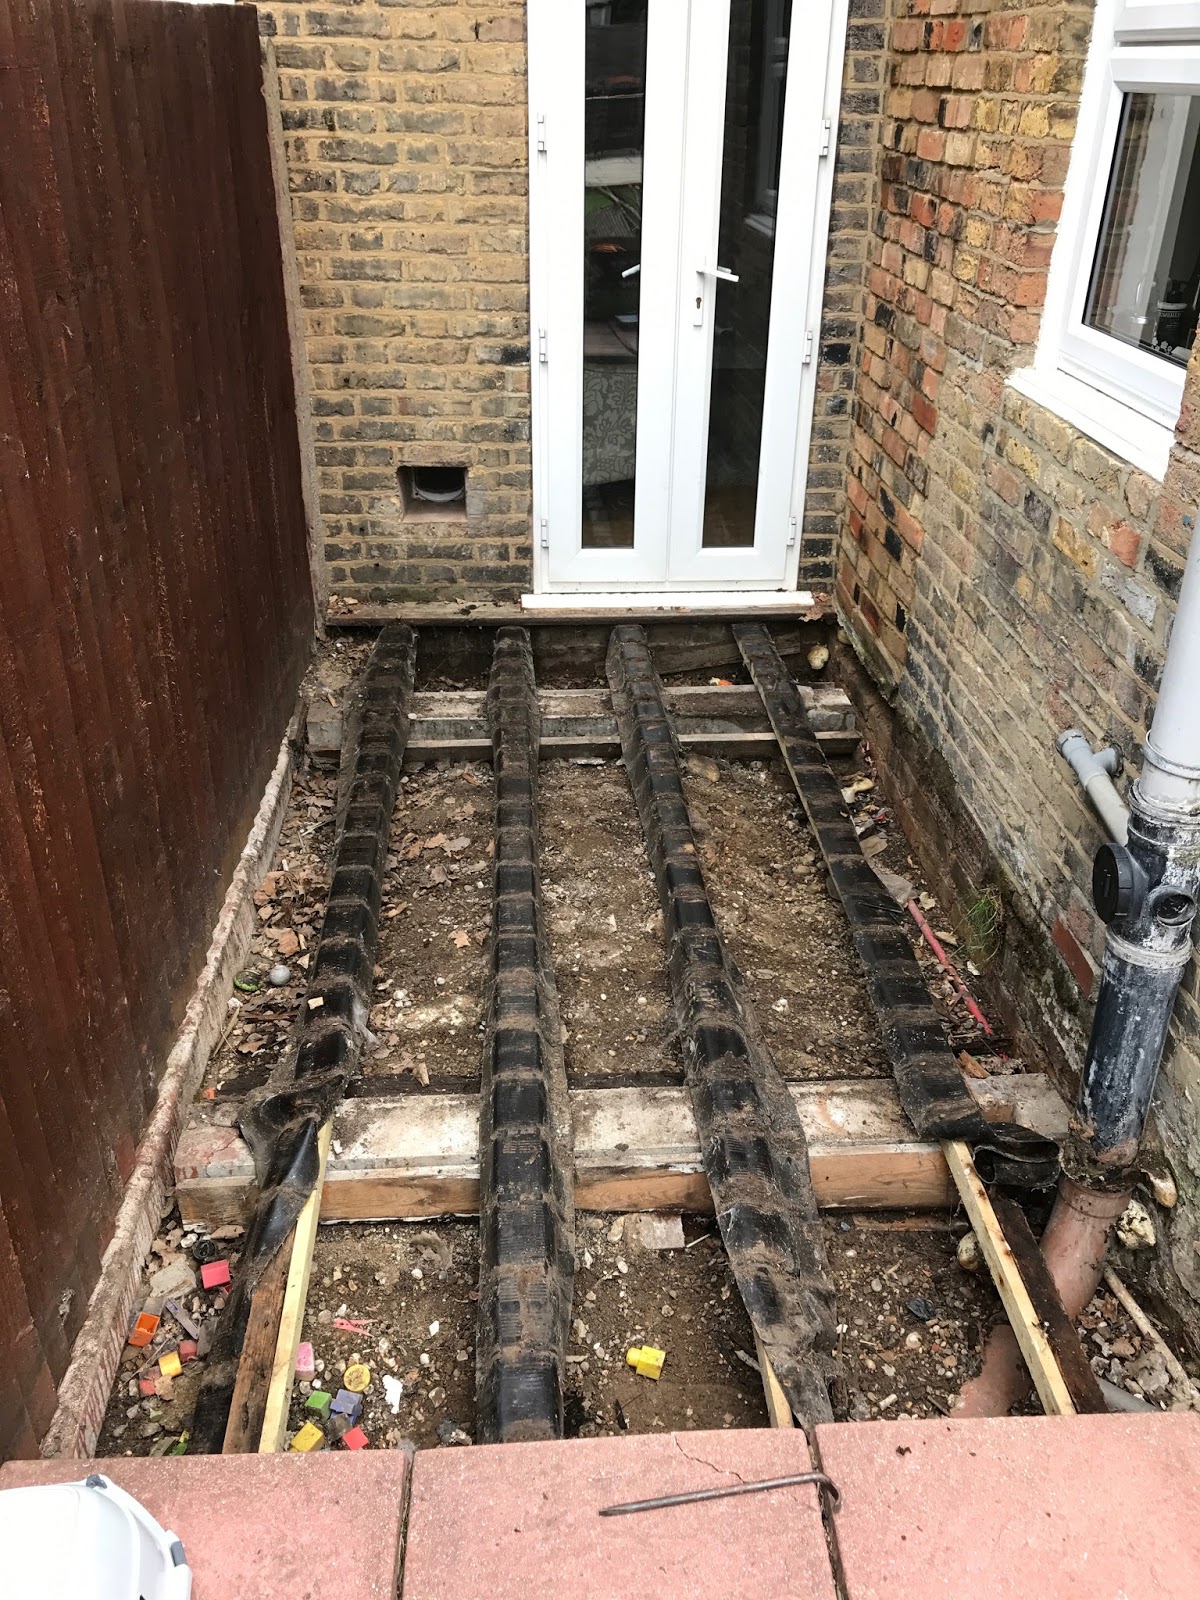
These beams were replaced with pressure-treated beams 4x2 from Wickes. In the process, two additional beams were added along the wall and fence to allow us to lay the new Balau boards lengthways on the supports added in, creating a frame similar to the floor in a loft space.
Laying the boards lengthways will hopefully give more depth to the decking and minimise open end-grain to offset any potential rot in the future (though this hardwood I think will withstand a lot of weathering!)

This is where I ran into a problem. I bought the new decking at a very good price, and felt happy I was laying quality wood at such a bargain. The added expense of the new beams was unfortunate but I would rather know that everything is stable and secure underneath.

However, my 18v Black & Decker drill just wasn't man enough for the job, and driving 4" screws into the wood for the frame caused the motor to burn-out early on. Cue a trip to the local branch of Screwfix and I am now the proud owner of a 18v Makita drill with 2x 3aH batteries and an amazing amount of torque - where the B&D was struggling to drive the screws past half-way, this throws them into the wood and buries them by about a quarter inch!


I am a huge fan of the "Still Untitled: The Adam Savage Project" Podcast. Early on in it's broadcast, Adam discussed his approach to buying tools - if you're going to use a tool once a year, buy the cheap version but if a tool is going to get constant use, go for a decent model as the cheaper one is false economy in this respect. For anyone interested in building, making, DIY, tools and workshops I highly recommend this podcast, Adam is an amazingly interesting man to listen to on these subjects!

The final job this year will be laying the first patio - cutting a step into its level to allow easier access (it's currently a little high!) and building a second planter which should, in time, allow growth of tall plants to screen off the sheds (old outhouse buildings) and cutting in a second bed on the left to house box-hedging and a small Cherry-tree that's being donated to us!
All-in-all I am overjoyed with the progress made so far, considering all work has been confined to weekends and evenings!
I am sure I will post on this subject again in the future as more progress is made!
I am sure I will post on this subject again in the future as more progress is made!
Comments
Post a Comment